Week 4 of Twelve Weeks of Christmas projects
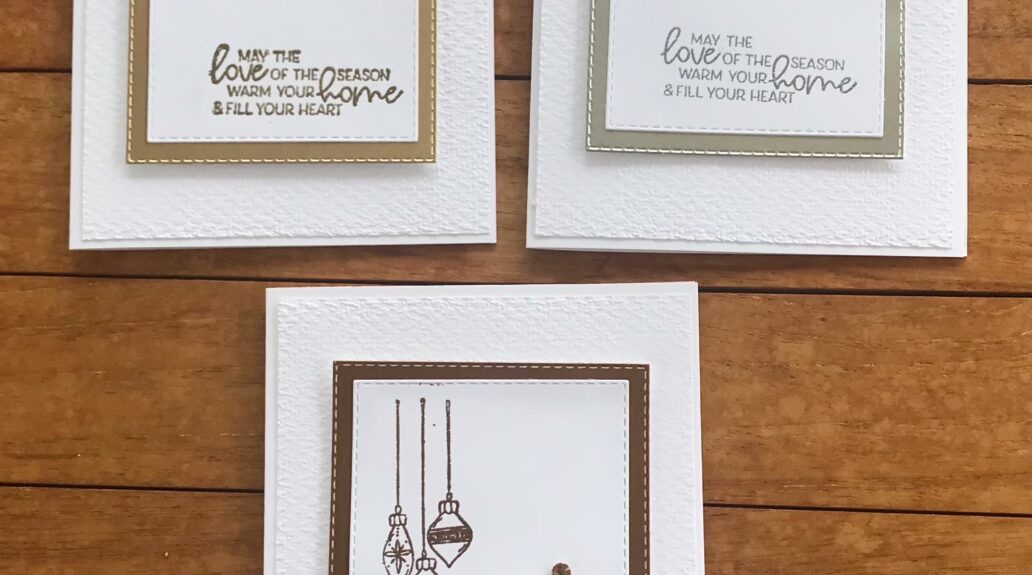
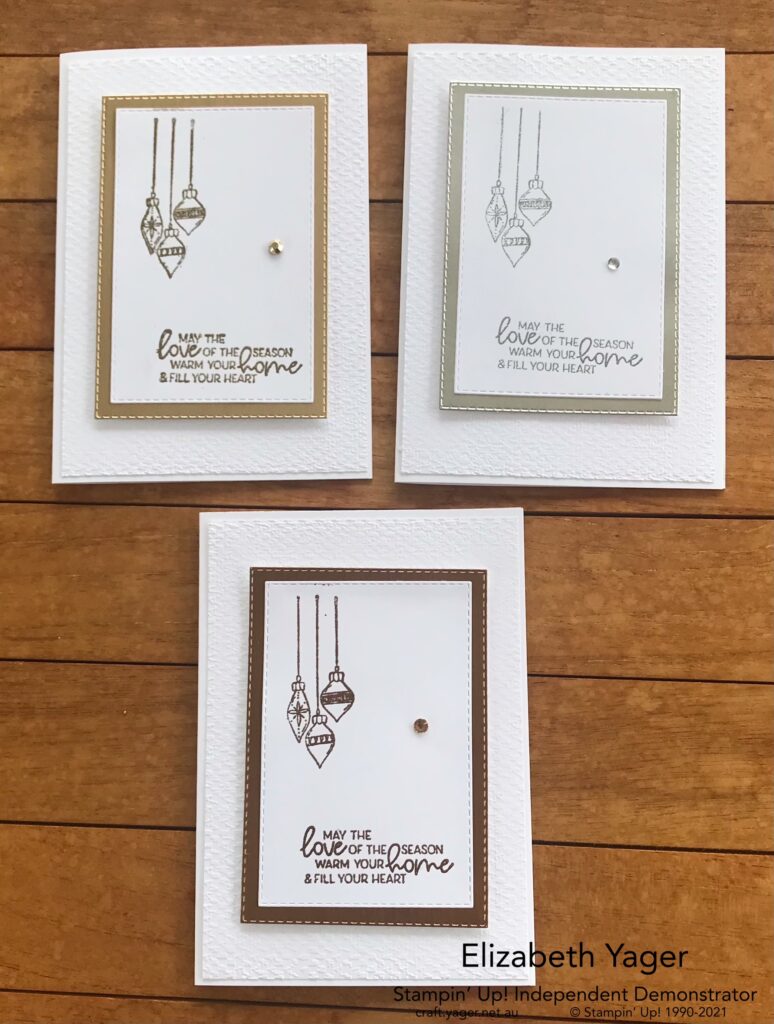
There is something very elegant about a white card with touches of metallic on it. I decided to create some cards using gold, copper and silver foil and Basic White cardstock and some embossing.
I also used the Stitched Rectangle dies and the Tasteful Textures Embossing folder.
The card is create din Basic White. I layered another piece of the Tasteful Textures Embossed cardstock on top and then added the other two layers on top of that. The top two layers are raised on dimensionals.
I embossed some baubles and a sentiment from the Whimsy Christmas stamp set in the appropriate colour for each card. Stampin’Up have three choices in metallic embossing powder – gold, silver and copper. I added some Brushed Metallic Speciality cardstock below the white panel. You can save the centre part of this for another project – just make sure you cut it smaller than your front panel!
I then added a Rhinestone Basic Jewel to each card front. You can find instructions below.
Supplies
- Base: 1 piece of Basic White cardstock 21 x 14.85cm scored in half at 10.5cm
- Layer 1: I piece of Basic White cardstock 10 x 14.3cm embossed with the Tasteful Textile folder
- Layer 2: 1 piece of Brushed Metallic Speciality cardstock – gold, silver or copper – cut out using Stitched Rectangle dies.
- Sentiment: 1 piece Basic White cardstock embossed in the appropriate colour
- Rhinestone Basic Jewels (silver)
- Gilded Gems (gold)
- Champagne Rhinestone Basic Jewels (copper)
- Mini Dimensionals, Stampin’ Seal
- Scissors, Heat gun, Paper Trimmer
- Versamark
- Gold, Silver or Copper Embossing Powder
Instructions
- Glue Tasteful Textures embossed cardstock to front of card.
- Stamp baubles and sentiment in Versamark and sprinkle embossing powder on it and headset.
- Cut out using Rectangle Stitched dies. You can do this before or after you stamp it. I often stamp the baubles, cut out and then stamp the sentiment to get spacing correct.
- Glue Sentiment to Brushed Metallic Paper and add mini dimensionals to the back of the metallic paper and place this on the front of your card.
- Add a jewel in the appropriate colour to the front of card.


 CARDSTOCK")


