Week 5 of the Twelve Weeks of Christmas Projects
This beautiful suite is available from 2nd November to purchase until 3rd January. After that the stamp and die set will be available in the new January/June Catalogue. The DSP, cotton paper and gems are only available during the next two months.
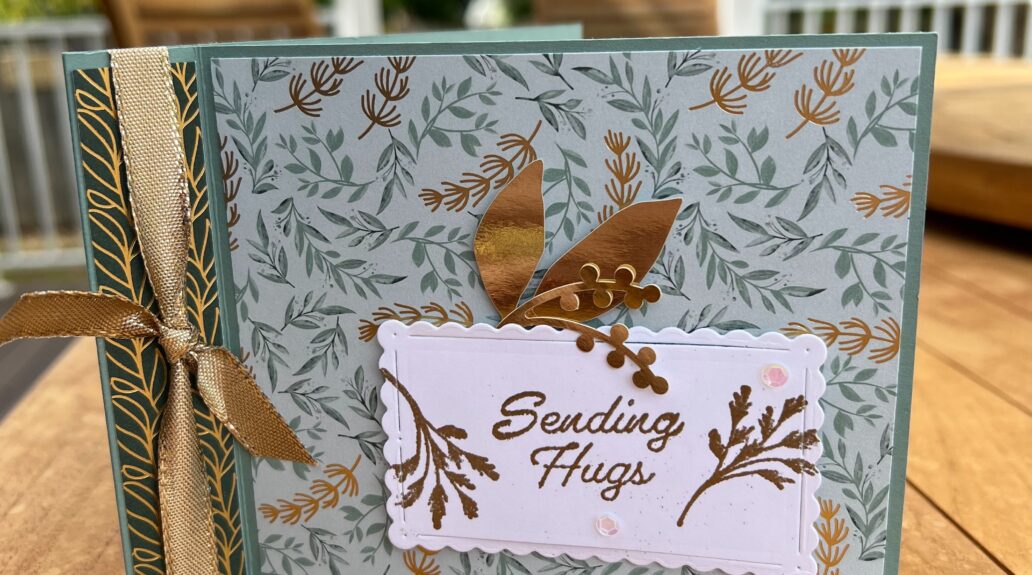
The DSP is so beautiful in its shades of green with gold touches and either side of it is very adaptable.
For this card I decided to make a ‘book’ card. It is officially called a Book Binding Fold card! These are quite easy to make and look very effective.
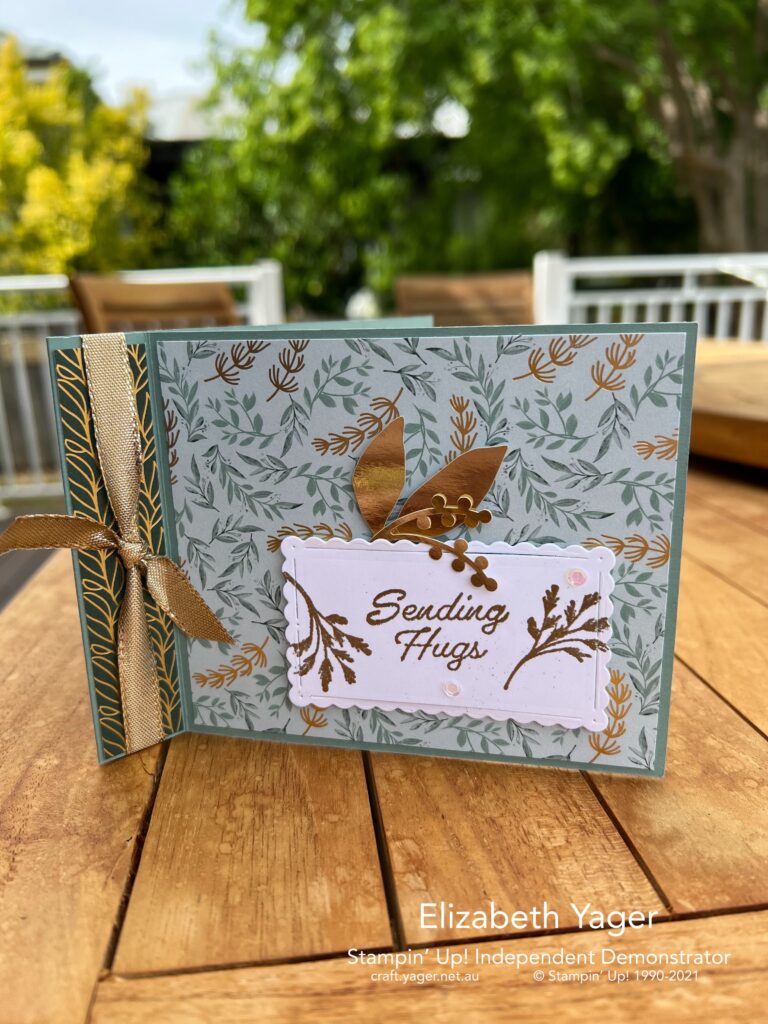
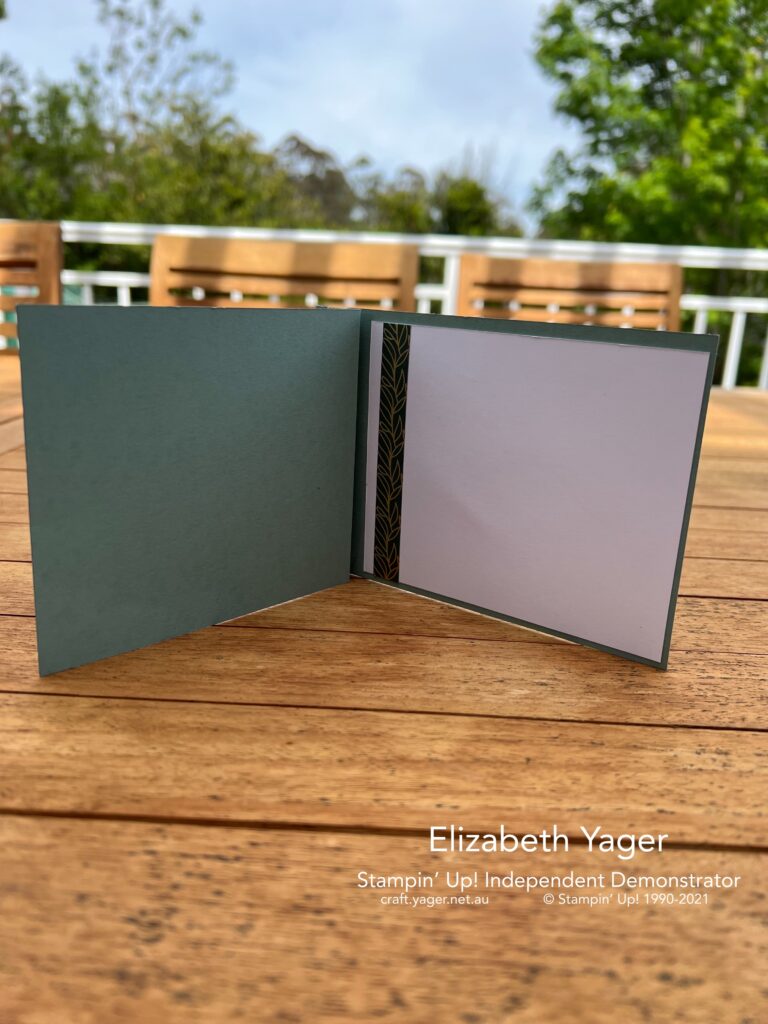
I chose two different pieces of DSP for the spine and the front of the card and used the same as the spine DSP inside the card. Measurements and instructions are below.
I added some gold shimmer ribbon to the spine and gold embossing on the sentiment. The sentiment was cut using Scalloped Contour Dies and placed on the card using dimensionals. I added some gold foil leaves from the Expressions in Ink Ephemera pack for added interest and also some of the adhesive sequins from the same pack to the sentiment.
The base is Soft Succulent with a Basic white insert to write your message on.
Supplies
- Base: 1 piece of Soft Succulent A4 cardstock 29.7 x 10.5 scored in half at 14.85cm and scored on front at 2.5 cm from the previous score. (Just cut the A4 down the centre on short side for correct size).
- Insert: I piece of Basic White cardstock 10 x 12cm
- Front DSP: 1 piece of Eden’s garden DSP 10.2 x 12 cm for right side of front and a contrasting piece 10.2 x 2.2 cm for the left side and a narrow strip of the same contrasting DSP for inside 10 x 1.2 cm
- Sentiment: 1 piece Basic White cardstock
- Expressions in Ink Ephemera gold foil leaves and adhesive sequins
- Mini Dimensionals, Stampin’ Seal
- Scissors, Heat gun, Paper Trimmer
- Versamark
- Gold Embossing Powder
- Eden’s Garden stamp set
- Scalloped Contours Dies.
- Gold shimmer ribbon – 30cm
Instructions
- Burnish scored lines.
- Add DSP to front of card and on insert. Leave insert aside for now)
- Place ribbon on the binding between back and front layers and knot in place. Add glue to this part and glue front to back to make a ‘spine’.
- Add insert to the card.
- Stamp the sentiment and branches in Versamark and heat gold emboss. Cut out using the scalloped contour die. (2nd smallest rectangle)
- Add dimensionals to the sentiment and place on front of card and then add foil leaves and adhesive sequins.
Product Listing
Remember to use the November Host Code EYFUHQ2T on your order to receive a discount.


")
")
 COTTON PAPER")
 SPECIALTY DESIGNER SERIES PAPER")


 SHIMMER RIBBON")


